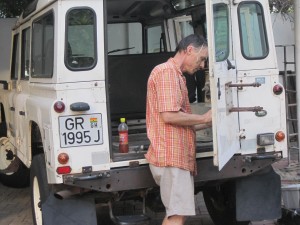
The spare tire holder on the rear door poses a bit of a dilemma. I am not sure I want to keep a tire there at all, since Paani impressed upon me how carrying a tire on the rear door on rough roads can damage the the door frame. I don’t like the way the rear door behaves with a big 750/16 tire and wheel on it anyway.  I thought it might be better to carry the spare tire on the bonnet, which the high Land Rover front seat and window makes possible without affecting visibility.
The rear door spare tire carrier consists of a foot square steel plate on the outside of the door, attached to the door itself via 11 bolts into another plate on the inside of the frame with three large three large bolt-like extenders welded to it  that go through the holes in the body and the outer plate to secure the wheel through the bolt holes. From the perspective of getting ready to paint, the steel plate on the outside would be difficult to tape around and I would never be able to get the sprayer to remove it. He would want to take the tape-around short-cut so popular among house and vehicle painters alike here. Then everything  appears as if it were “painted around†– not an image I want to convey in this rebuild. But for the rear-door wheel carrier Paani said that it would be too difficult to remove, and upon first inspection it did indeed appear as if the whole thing might be welded to the frame inside the door,  perhaps as a result of the door frame repair that Paani did.  However I could not resist trying to loosen the  11 bolts and to my delight they all came undone quite easily and the interior plate to which the wheel holders are welded to slipped out nicely and the whole unit came out. With that the exterior body is pretty much stripped, save the rear wheel arches that rim the wheel wells.
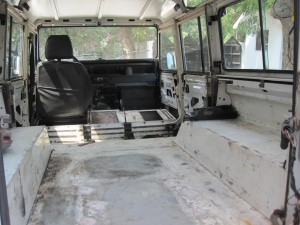
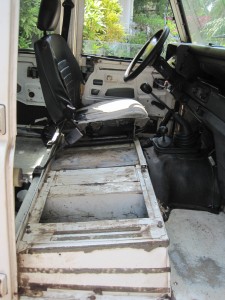
With that I have moved to the interior, which was already pretty stripped by Paani during the earlier body work which included the door work and filling of some random bolt holes here and there.  The roof liner, the door panels , and the rear cargo bay bench seats are all gone. But when you look at it through a spray painters eyes you realize how much is still left to take out.  Seat belts for example. Seat belts are secured by bolts through the frame in two places.  I spent a couple of hours after work this week to try to get them out, but was only partially successful, frustrated by limited tool choices.  Nuts that have been on bolts on the bottom exterior for fifteen years are not easily removed despite any amount of WD40. I was able to get one end of the belts free on both sides, but I could only loosen the two that are directly bolted into the chassis frame enough so the seat belt rollers come away from the interior body enough to expose the surface underneath for painting and can be wrapped to keep the paint off them. Better than taping, but not much. The good news story is the the “cubby†box between the front seats. This was surprisingly easy to get out, four bolts that thread through 2×2, the only wood in the whole vehicle, into threaded holes right in the frame.
I was also able to remove the front passenger seat quite easily (need to leave the drivers seat in to be able to drive to the sprayer!) – my nemesis was the back seats.  There are no fewer than 12 bolts that secure the simple bench seats  through the floor into the frame. The nuts underneath have not been touched for 15 years and are EXTREMELY stiff and rusted.  I was able to loosen and remove a couple, but stripped two of the nuts quite badly and decided to stop and review alternatives. Francis just happened to come by to drop off the refinished front grill as I was struggling with these in our yard and he came to my rescue with an invite to his shop where he has access to an arc welder that can cut them off.
Today I left work early to beat traffic and drove out to the Kaneshie district where Francis has his shop. He had one of his boys take me over to another place, down a side street, off onto a dirt track that wound through some houses into an industrial yard that led to a fair-sized machine shop that was retooling various pieces of machinery and gears from transmissions and the like. The yard smelled seriously of waste, there must have been an open sewer, a not-uncommon phenomenon in Accra, behind the adjacent wall.
I was welcomed by a couple of fellows to whom the boy did the explaining in Twi, upon which they pulled out their tools and went to work. They were able to get three of the twelve bolts out intact.  The other nine were removed with a hacksaw or smashed with a large three foot chisel and a sledge hammer, not tools I have in my kit, but against which a ½“ bolt is no match. The electric welder on standby was never called upon, brute force prevailed. The back seats are now out, and I am (only) 30 cedis (20 dollars) poorer for the labour and the tools. Francis has someone getting nuts and bolts to replace the ones that were lost to the process.

Finally got the back seats out, the cargo bay bench seats have been out for months. The ride like this is anything but quiet.
However, that was not the last thing to take out. There are also plastic covers over the back seat catches, and the foam and fabric liner around the front seat boxes, which is glued down and leaves annoying strips of foam behind on the metal that has to be scraped off. Then there is the a piece of interior liner above the rear door that had escaped Paani’s removal campaign, and the seat belts in the front. There don’t seem to have ever been any seat belts in the back seat.
I don’t think there is any good reason to delay painting any more.  I know as soon as it is painted it will start to get nicks and scratches and that creates some degree of inertia, but I can get touch-up paint and the work here is very good and not expensive.  Once the paint is on we can proceed to finish the interior off with the new cushions and seat covers that are sitting in our storeroom, put the soundproofing and carpet in and put back all the interior fittings. None of that will take very long, soon we will be able to focus on the expedition prep. But painting is next.


